
How to Grow Microgreens at Home: A Complete Guide to Fresh Food, Grocery Savings & Selling
Microgreens are one of those projects that look almost too easy when you watch someone else do it. Sprinkle seeds into a tray, add some water, put them under a light, and a week or two later you supposedly have a miniature field of perfect, crisp greens ready to harvest.
Your first attempt may tell a different story.
The seedlings might grow tall and flimsy, the soil can suddenly dry out, sections of the tray can collapse, mold can appear, or the finished greens simply might not taste very good. That does not necessarily mean microgreens are difficult to grow. More often, it means that several small details—light, moisture, airflow, seed density and harvest timing—need to work together.
Once you understand those details, microgreens can become one of the fastest and most dependable food crops you can grow indoors. Many varieties go from seed to harvest within roughly one to three weeks, require very little space, and can be produced throughout the year. They can provide fresh food during winter, supplement vegetables from an outdoor garden, reduce how often you buy expensive specialty greens and, at a larger scale, even become the foundation of a small local side business.
This guide covers the fundamentals of growing strong, healthy microgreens at home, along with some of the mistakes that commonly produce weak, shriveled or disappointing crops.
What Are Microgreens?
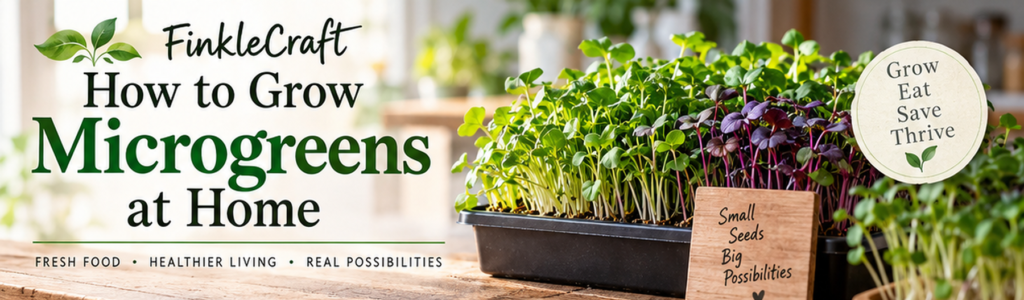
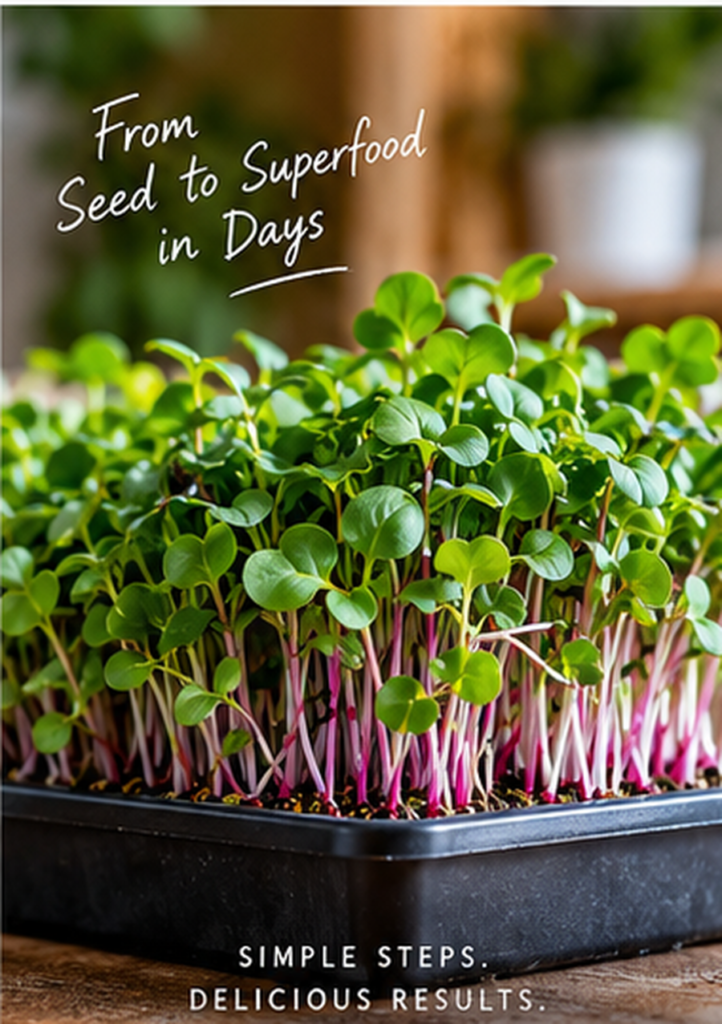
Microgreens are young edible vegetable and herb plants harvested shortly after germination. They are older than sprouts but much younger than full-sized vegetables. Shortly after a seed germinates, it produces its first seed leaves, known as cotyledons, followed eventually by its first true leaves. Microgreens are generally harvested around this early stage of development.
Unlike sprouts, which are normally grown without soil and eaten with their roots and seed attached, microgreens are grown in a shallow growing medium and cut above the surface. You eat the tender stems and leaves while leaving the roots behind.
Most finished microgreens are only a few inches tall. Depending on the variety and growing conditions, some can be ready in a week while slower-growing crops may require several weeks.
That short turnaround is one of their biggest advantages. An outdoor tomato plant may occupy space for months before producing food. A tray of radish microgreens can potentially complete an entire growing cycle in a fraction of that time.
Why Grow Microgreens at Home?
Microgreens will not replace staple foods such as potatoes, rice, beans, meat or flour. They are not primarily a calorie crop. What they can do is provide a steady supply of extremely fresh leafy vegetables using very little growing space.
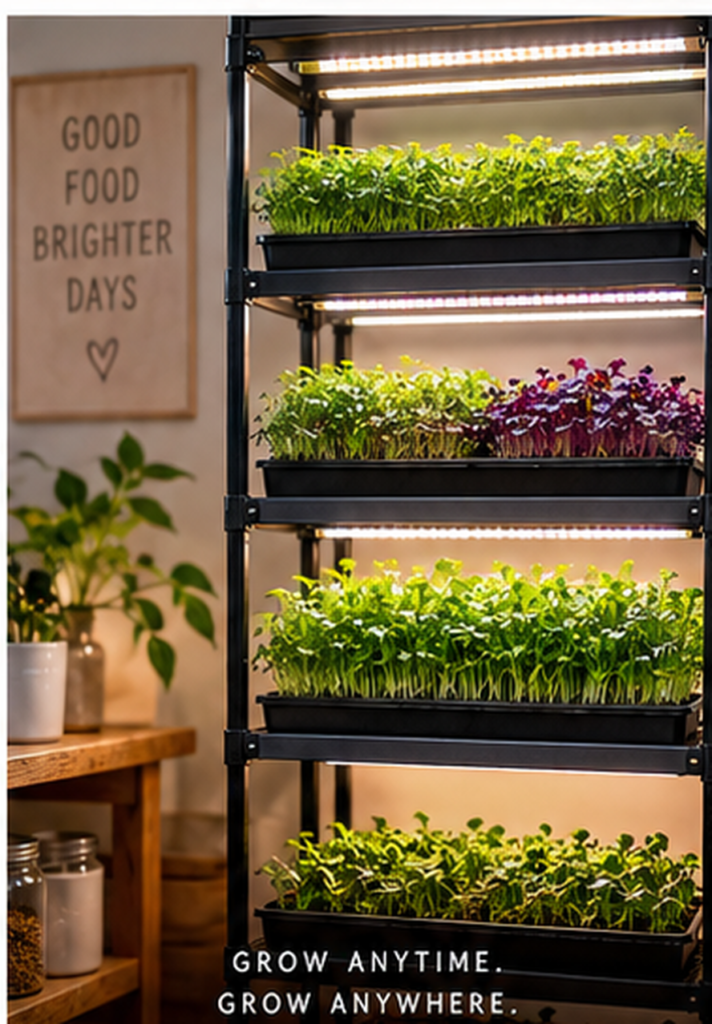
A small shelving unit equipped with inexpensive grow lights can potentially operate all year. That is especially valuable in northern climates where an outdoor vegetable garden may be inactive for several months. Instead of waiting for spring, you can have new crops germinating while snow is still covering the backyard.
Microgreens are also interesting nutritionally. Research by the USDA Agricultural Research Service found that the 25 microgreen varieties it studied generally contained substantially higher concentrations of certain vitamins and carotenoids than their mature counterparts. Nutrient levels vary by plant, variety and growing conditions, so it is better to think of them as nutrient-dense vegetables rather than some kind of miracle food.
Perhaps their biggest advantage, however, is practicality. The same basic equipment can grow radish, broccoli, peas, sunflower, arugula, mustard, basil and numerous other crops. Once your growing system is working reliably, changing the food you produce may be as simple as opening a different bag of seeds.
The Best Microgreens for Beginners
Some microgreens are much easier to grow than others. If you are learning, starting with a forgiving crop will save you considerable frustration. Radish is one of the best beginner choices because it germinates quickly, grows aggressively and produces relatively sturdy stems. The finished greens have a noticeable peppery radish flavour.
Broccoli is another good beginner crop. Its seedlings are somewhat more delicate than radish, but it grows quickly and has a relatively mild flavour that works well in salads, sandwiches and smoothies. Pea shoots are larger and more substantial, producing sweet, crunchy stems that actually taste like fresh peas. Sunflower microgreens are similarly substantial and have a mild, slightly nutty flavour.
More adventurous growers can eventually experiment with arugula, mustard, basil, cilantro and specialty mixes. Basil and cilantro tend to grow more slowly, so they may not be the best crops for learning the basic process.
For your first attempt, there is nothing wrong with growing only one or two varieties. Producing an excellent tray of radish or peas is far more useful than producing five mediocre varieties simultaneously.
What You Need to Grow Microgreens
A basic setup is surprisingly simple. You need good-quality seed, shallow trays, growing medium, light, water and some airflow. Standard 10-by-20-inch growing trays—often called 1020 trays—are popular because they are inexpensive and fit neatly on common shelving systems.
A particularly useful setup uses two trays together. The upper tray contains drainage holes and holds the growing medium and plants. A solid tray underneath catches water and allows the crop to be watered from below. This two-tray system makes it much easier to maintain consistent moisture without soaking the foliage.
For growing medium, lightweight seed-starting mix, coconut coir and purpose-built microgreen media can all work well. Ordinary backyard garden soil is usually a poor choice indoors because it can be too dense, drain poorly and introduce pests or microorganisms into the growing area.
You will also want a grow light if you expect consistent results. A bright window can work under the right conditions, but indoor sunlight changes dramatically with the season. An inexpensive LED grow light attached to a timer gives you far more control.
A small fan is useful as well. You do not need enough wind to blow seedlings over. Gentle air movement helps reduce stagnant humidity around a dense canopy of plants and can encourage sturdier growth.
How to Grow Microgreens Step by Step
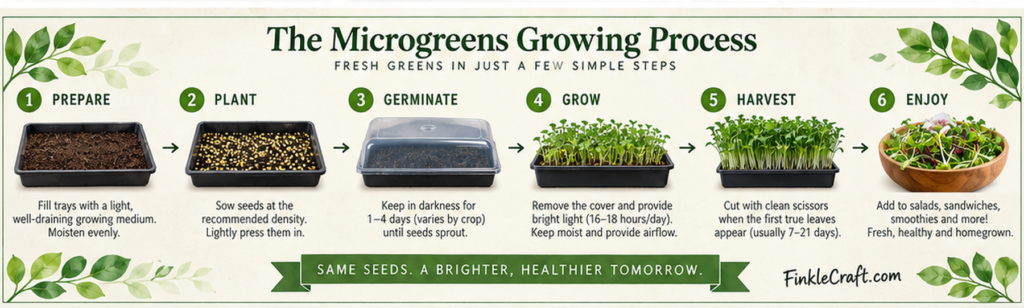
The process starts by cleaning your equipment. Microgreens grow densely under warm, moist conditions, which happen to be conditions that fungi and bacteria also enjoy. Wash reused trays thoroughly and remove old roots, growing medium and plant debris before starting another crop.
Next, pre-moisten your growing medium before planting. This is an important step that many beginners overlook. The medium should feel roughly like a wrung-out sponge—thoroughly moist but not dripping with water. Starting with evenly hydrated material makes it much easier to maintain consistent moisture as the seeds germinate.
Spread the growing medium evenly through the tray and gently level the surface. You do not need several inches of soil because the plants will only grow for a short time. The seeds should then be distributed as evenly as possible across the surface. Different crops require very different seed densities, so weighing seeds with a small digital kitchen scale is far more repeatable than simply throwing in a handful.
Large seeds such as peas and sunflower often benefit from soaking before planting. Smaller seeds such as broccoli and radish usually do not require it. After planting, lightly press the seeds into contact with the growing medium.
Many growers then place another tray on top of the planted tray for the germination period. A small amount of evenly distributed weight can improve seed-to-medium contact and encourage roots to anchor themselves properly. During this early stage, the seeds remain in darkness while they germinate.
The blackout period should be relatively short. Microgreens are not intended to grow in darkness indefinitely. Once germination is well underway and the seedlings begin pushing upward, they need light.
Light Makes a Huge Difference
One of the easiest ways to produce weak microgreens is to give them inadequate light.
Seedlings naturally stretch toward a light source. When light is too weak or too distant, they can develop long, thin stems as they desperately try to reach it. That is why a tray grown beside a dim winter window can look completely different from one grown under a proper LED fixture.
A practical starting point is roughly 16 to 18 hours of light per day, followed by several hours of darkness. A basic outlet timer can automate the entire schedule.
The ideal distance between the plants and the grow light depends on the light itself. A weak fixture may need to be fairly close, while a more powerful light may need additional distance. Pay attention to the plants rather than blindly copying a measurement from someone else’s setup.
Healthy microgreens should generally appear compact, colourful and upright. If they become excessively tall, pale or floppy, inadequate light is one of the first things to investigate.
Watering Microgreens Without Killing Them
Watering is probably the most common reason a tray either thrives or fails.
Microgreens have shallow root systems and can dry out surprisingly quickly. At the same time, leaving the growing medium constantly saturated can encourage mold, algae and root problems. The goal is consistent moisture rather than large swings between completely soaked and completely dry.
During germination, misting can help keep small seeds moist. Once the plants are established, bottom watering is generally a better approach. Add clean water to the solid lower tray and allow the growing medium to absorb it upward through the drainage holes.
You should not leave the tray permanently sitting in deep water. Give it enough to restore moisture and then allow the root zone to breathe.
There also is no universal rule saying you must water once every morning or exactly twice per day. Water use changes with room temperature, humidity, fan speed, plant size, seed density and growing medium.
Learn to check the tray itself. Feel the surface. Lift it and notice its weight. Eventually you will recognize the difference between a properly hydrated tray and one beginning to dry out.
That ability is far more useful than following a rigid watering schedule.
Why Do Microgreens Become Weak and Floppy?
Thin or collapsing microgreens are normally giving you a clue about their environment.
If the stems are extremely long and weak, they may not be receiving enough light or may have spent too long under blackout conditions. If an entire tray suddenly wilts, the growing medium may have dried out. If plants begin collapsing directly at the soil line despite plenty of moisture, disease such as damping-off becomes a possibility.
Excessive moisture combined with stagnant air can also create problems. A dense tray contains hundreds or thousands of tiny plants packed closely together, so humidity can become trapped between them. Gentle airflow helps remove that moisture and makes conditions less favourable for fungal growth.
One confusing sight for new growers is the appearance of fine white fuzz around roots. These can sometimes be normal root hairs rather than mold. Root hairs tend to appear uniformly around healthy roots and often collapse against the root when misted with water. Actual mold may spread in irregular web-like patches across seeds, soil and dead plant material.
Use your senses as well. A healthy tray should smell fresh and earthy. Slimy plants, rotten odours or obviously spreading fungal growth are good reasons to discard the crop rather than take a chance.

How to Harvest Microgreens
Most microgreens are harvested after the seed leaves have fully opened and around the time the first true leaves begin appearing. The exact ideal stage depends on the variety and your preference for flavour and texture.
One of the easiest ways to decide is simply to taste them. A home grower does not need to harvest at precisely the same age as a commercial operation.
Use clean, sharp scissors or a knife and cut the stems just above the growing medium. Try not to drag soil or other growing material into the harvested crop. Sharp cutting tools are important because crushing delicate stems can damage the plants and reduce their storage life.
Freshly harvested microgreens should be refrigerated promptly if they will not be eaten immediately. Keeping them relatively dry during storage can also improve their quality.
A strong, properly hydrated crop should have noticeably more structure than a tray of weak seedlings. The stems should not immediately collapse into a wet pile the moment you cut them.
Why Microgreens Sometimes Collapse After Cutting
A harvested microgreen is no longer connected to its root system. That means the water stored inside the plant is all it has until you eat it.
If the plants were already dehydrated before cutting, had grown excessively thin due to poor lighting, or are damaged while harvesting, they can wilt extremely quickly.
For better results, harvest while the crop is healthy and well hydrated, use sharp scissors, avoid crushing the stems, cool the harvested greens quickly and keep them from becoming unnecessarily wet during storage.
In other words, post-harvest quality actually begins several days before harvest.
What Can You Eat Microgreens With?
One of the biggest mistakes people make is growing microgreens because they are supposedly healthy without having any plan for actually eating them.
Microgreens work particularly well on sandwiches and wraps because they can replace lettuce while adding significantly more flavour. Radish microgreens can give a sandwich a peppery bite, while peas and sunflower provide milder flavour and more crunch.
They also work well with scrambled eggs, omelets and breakfast sandwiches. Fresh greens can be added to tacos, burgers, rice bowls, pasta, soups and pizza. For hot dishes, adding them near the end of cooking—or after cooking—is usually preferable if you want to preserve their fresh texture.
Milder crops such as broccoli, kale, pea shoots and sunflower can also be blended into smoothies. Start with a small handful instead of turning the entire drink green. Mixing microgreens with fruit, yogurt, milk or your normal smoothie ingredients is an easy way to use a harvest without needing to eat bowls of raw greens.
The best microgreen is ultimately one you will actually eat. There is little value in growing an extremely nutritious variety if you hate the flavour.
Can Growing Microgreens Save Money on Groceries?
Yes, but this needs to be looked at realistically.
If you normally spend nothing on fresh greens and then begin growing microgreens, you have produced food—but you have not necessarily reduced your grocery bill by the retail value of that crop.
The real savings happen when homegrown food replaces something you would otherwise buy.
Premium salad greens and packaged microgreens can be relatively expensive compared with the amount of food inside the container. When you produce similar greens using seed, reusable trays and inexpensive growing medium, the cost per harvest can fall considerably once your equipment is already purchased.
To understand your actual savings, keep records. Track how much seed you use, how much growing medium costs, your approximate electricity usage and the weight of the finished harvest.
Then compare that with what an equivalent amount of similar greens would cost at the store.
The basic calculation is:
Retail replacement value − production cost = approximate grocery savings
It is not necessary to obsess over pennies. Even approximate records will tell you whether your system is producing economical food.
Could You Grow Enough Microgreens to Make a Difference?
Definitely, but start small.
Two or three trays in rotation may provide a regular supply for one household. A small shelving rack with several trays planted on different days could provide multiple harvests throughout the week.
The important concept is succession planting. If you plant every tray on the same day, they will probably all become ready at approximately the same time. That gives you a huge pile of greens followed by nothing.
Instead, stagger planting dates. Plant one crop today, another several days later, and another after that. Once you know approximately how long each variety takes under your conditions, you can create a continuous harvest schedule.
This is where microgreens become particularly useful for self-reliance. The goal is no longer just growing a novelty tray once. You are creating a small indoor food-production system.
Could Microgreens Become a Side Hustle?
Potentially, yes.
Microgreens have several characteristics that make them interesting for small-scale selling. They grow quickly, use relatively little space, can be produced indoors all year and can command a fairly high price relative to their weight.
However, the hard part may not be growing them.
The difficult part is finding customers.
A shelving rack can produce far more microgreens than one family needs. If those greens have nowhere to go after harvest, their value disappears quickly because fresh microgreens are highly perishable.
That is why it is usually smarter to build demand before dramatically expanding production.
You might begin by learning to produce one or two trays consistently, then offer samples to friends, neighbours or coworkers. If several people want to purchase them regularly, you can increase the number of trays in rotation.
Eventually, possible customers could include households, restaurants, cafés, meal-preparation businesses, farmers markets or local food stores.
How Many Trays Would You Need to Start Selling?
There is no magical number.
You can technically sell part of one tray if someone wants to buy it.
A small test operation might begin with only several trays being harvested each week. That gives you enough production to learn packaging, harvest timing, customer preferences and repeat ordering without creating a mountain of food you cannot sell.
If demand grows, you might eventually operate 10, 20, 40 or more trays in rotation.
The smarter approach is to work backward from demand.
Suppose customers collectively want 1,200 grams of one particular crop every week and your own records show that an average tray reliably produces about 150 grams.
You would need approximately eight harvested trays per week, plus a small buffer for underperforming crops.
That calculation is far more useful than deciding you want to own 100 trays simply because the number sounds impressive.
Food Safety Matters
Food safety deserves serious attention, particularly if you ever sell your harvest.
Microgreens are commonly eaten raw. Unlike vegetables that may later be boiled or roasted, there may be no cooking step to reduce microbial contamination.
Use clean trays, clean water, reputable seeds and growing media, and clean harvesting tools. Keep pets away from the production area and clean surfaces that come into contact with the crop.
If you begin selling, investigate the food-safety and business requirements that apply in your own region. Rules may vary depending on whether you sell directly to consumers, through markets, to restaurants or through retail stores.
Do not build a large commercial setup first and figure out the rules afterward.
Treat Your First Few Trays as Experiments
One of the best things you can do when learning microgreens is keep simple records.
Record the variety, seed weight, planting date, soaking time if applicable, blackout time, harvest date and finished weight. Also write down anything that went wrong.
After several crops, patterns begin appearing.
You might discover that your radish consistently performs best with a certain amount of seed and a specific blackout time. You may find that peas need slightly more water in your growing room or that sunflower performs better with a different density.
Instead of repeatedly guessing, you gradually create your own growing recipes.
That is the difference between occasionally producing a good tray and being able to repeat the result whenever you want.
Start With One Excellent Tray
It is easy to look at photographs of commercial microgreen farms and immediately imagine shelving racks covering an entire basement.
Do not start there.
Start with one tray.
Learn how moist the growing medium should feel. Learn how long your preferred variety takes to germinate. Watch how the seedlings respond when the light is too far away. Learn what the tray weighs when it needs water and what the crop tastes like at different harvest stages.
Most importantly, learn how to grow a crop you actually enjoy eating.
Once you can repeatedly turn dry seeds into a dense tray of crisp, colourful and tasty greens, scaling becomes much easier. Add another tray, stagger the planting date and repeat the same process.
From there, microgreens can be whatever you want them to be: a small kitchen garden, a year-round source of fresh vegetables, a way to reduce spending on premium greens, or perhaps even the beginning of a small local food business.
The basic principle stays the same.
Grow one excellent crop. Learn from it. Make the process repeatable. Then scale when there is a reason to.
Want to Go Much Deeper Into Growing Microgreens?
This article covers the fundamentals, but there is a lot more to explore once you start growing consistently.
A complete microgreen system can include crop-by-crop planting charts, exact seeding densities, detailed troubleshooting guides, equipment setups, growing-rack designs, harvest and storage methods, yield tracking, production-cost calculations, succession schedules and strategies for turning several trays into a small-scale business.