
How to Fertilize a Vegetable Garden and Hedges: A Practical Beginner’s Guide
A healthy garden does not need to be constantly fed. That is one of the first things new gardeners need to understand, because fertilizer bags, online advice, and garden-centre labels can make it feel like every plant needs a different product every week. In reality, good gardening is mostly about building decent soil, using fertilizer deliberately, watering consistently, and paying attention to what the plants are telling you.
Fertilizer can absolutely help vegetables grow faster, recover after transplanting, produce more fruit, and stay greener through the season. But too much fertilizer can create just as many problems as too little. A tomato plant overloaded with nitrogen may become huge and leafy but slow to produce tomatoes, while too much fertilizer placed directly against a young seedling’s roots can burn it before it has a chance to establish.
The goal is not to become a chemistry expert overnight. The goal is to understand what the numbers on a fertilizer bag mean, know which plants need a little extra help, and create a simple routine that works for tomatoes, peppers, cucumbers, pumpkins, melons, root vegetables, and hedges without making the garden more complicated than it needs to be.
Quick Answer: What Fertilizer Should Most Gardens Use?
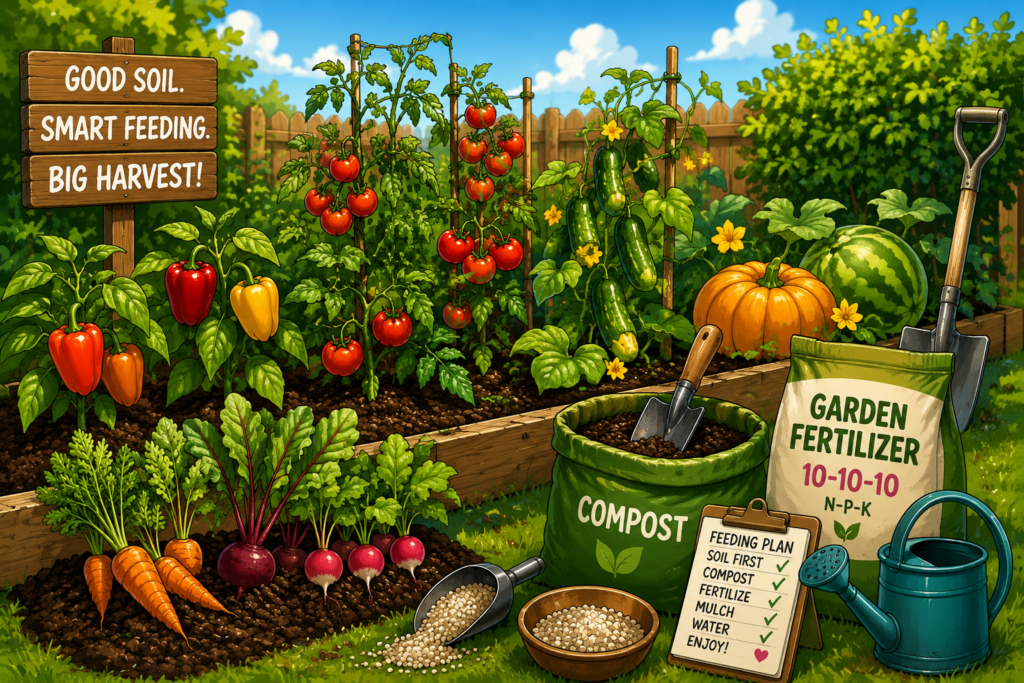
For a beginner vegetable garden, compost plus a balanced slow-release garden fertilizer is usually the easiest place to start. Compost improves soil structure and adds organic matter, while a balanced fertilizer gives plants a more predictable supply of nutrients. A product such as 4-4-4, 5-5-5, or 10-10-10 can work as a general-purpose option when used according to the package directions.
Tomatoes, peppers, cucumbers, pumpkins, squash, and watermelons usually benefit from steady nutrition through the growing season, especially once they begin growing rapidly or setting fruit. Carrots, radishes, and beets usually need less aggressive feeding, because too much nitrogen can encourage leafy tops at the expense of good roots. Hedges are different again: a young hedge may benefit from modest spring feeding, but an established healthy hedge often needs mulch, water, and weed control more than heavy fertilizer.
The safest beginner rule is this: start modestly, water after feeding, and do not pile different fertilizers on top of one another without knowing what is already in the soil. If compost, granular fertilizer, and liquid fertilizer are all being used, space them out and follow the label directions rather than treating every product like it is harmless.
What Do the N-P-K Numbers Mean?
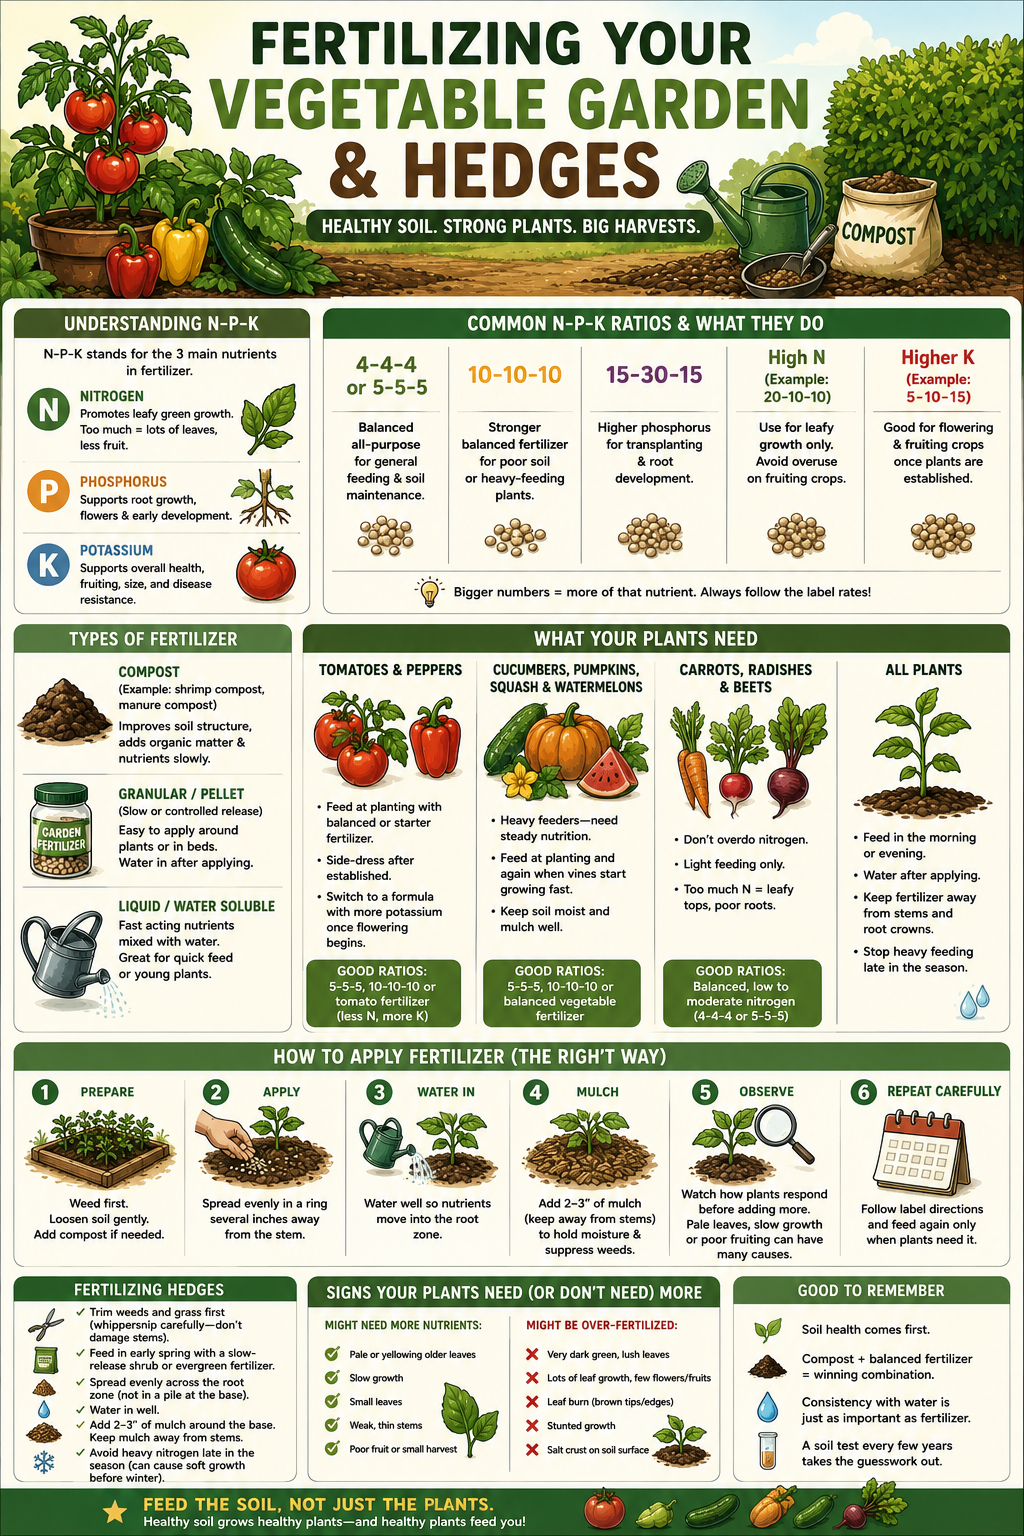
Every fertilizer bag has three large numbers on the label, such as 10-10-10, 4-4-4, 20-20-20, or 15-30-15. Those numbers represent the percentage of nitrogen, phosphorus, and potassium in the product. The order is always N-P-K.
Nitrogen, the first number, encourages green leafy growth. It is useful when plants are young, pale, slow-growing, or trying to establish themselves, but too much nitrogen can create a jungle of leaves and vines with fewer flowers and fruits. This is why heavily fertilized tomato and pepper plants sometimes look impressive but take forever to produce.
Phosphorus, the middle number, supports root development and early plant establishment. It is often included in starter fertilizers because young transplants need to establish roots quickly. However, gardeners should not assume that more phosphorus is always better, because many established soils already contain plenty of it.
Potassium, the final number, supports overall plant health, water management, stress tolerance, and fruit development. Fruiting vegetables such as tomatoes, peppers, cucumbers, pumpkins, squash, and melons need potassium, but that does not automatically mean you need a high-potassium product. The best choice still depends on what your soil already contains and how the plant is growing.
Here is a simple way to read common fertilizer labels:
- 4-4-4 or 5-5-5: Gentle, balanced, all-purpose feeding for mixed vegetable gardens and general maintenance.
- 10-10-10: Stronger balanced fertilizer that can be useful in poor soil, but should be measured carefully.
- 15-30-15 or similar starter fertilizer: Higher phosphorus product often used for transplanting or early root development.
- Higher-nitrogen fertilizer: Best used carefully for leafy crops or plants that are clearly nitrogen-deficient.
- Tomato or vegetable fertilizer with more potassium than nitrogen: Can be useful once fruiting crops are established, flowering, or setting fruit.
The numbers are not a scorecard where bigger is always better. A 20-20-20 fertilizer is not automatically “twice as good” as a 10-10-10 fertilizer. It is simply more concentrated, which means it needs to be used more carefully.
Compost, Granular Fertilizer, and Liquid Fertilizer: What Is the Difference?
Compost is the foundation material. It improves soil texture, helps sandy soil hold moisture, helps heavy soil become easier to work, and adds organic matter that supports soil life. Finished compost also contains nutrients, but the exact N-P-K value can vary widely depending on what it was made from.
Shrimp compost, manure compost, leaf compost, mushroom compost, and other bagged compost products can all be useful soil amendments. Think of them as soil builders first and fertilizers second. They can support plant growth, but they are not always a precise replacement for a balanced fertilizer, especially when growing hungry crops such as tomatoes, peppers, cucumbers, pumpkins, and melons.
Granular fertilizer is dry fertilizer that is spread on the soil surface, mixed into a bed before planting, or used as a side-dress beside established plants. Some granular products release nutrients slowly over time, while others work more quickly. Granular fertilizer is convenient because it is easy to apply around a row or plant, but it should always be kept away from direct contact with seeds, stems, and delicate roots unless the product label specifically says it is safe for that use.
Liquid fertilizer is mixed with water and applied around the root zone. It is useful for young transplants, container plants, plants showing mild nutrient stress, or gardeners who want a quicker response. Liquid feeding is not automatically better than granular feeding; it simply works faster and needs more frequent, lighter applications.
A good beginner approach is to use compost as the base, one main granular or slow-release fertilizer as the regular feeding plan, and liquid fertilizer only when there is a clear reason to use it. Trying to use every product at once can lead to overfeeding, salt buildup, and burned roots.
Should You Put Fertilizer Pellets Directly in the Planting Hole?
This is an important one, especially with transplants. A small amount of starter fertilizer can help a transplant establish, but concentrated fertilizer pellets placed directly under or against the root ball can burn young roots. The damage can look like wilting, yellowing, stunted growth, brown leaf edges, or a plant that simply fails to take off.
The safer method is to mix a label-approved starter fertilizer into the surrounding soil, apply it a few inches away from the planting hole, or use a diluted liquid starter fertilizer after planting. The goal is to make nutrients available in the root zone without creating a concentrated pocket of fertilizer directly touching the roots.
If you have already used a moderate amount of compost and granular fertilizer around newly planted vegetables, resist the urge to keep adding more immediately. Water the plants well, give them time to settle in, and watch how they respond over the next week or two. Fertilizer is not a daily treatment; healthy roots, warm soil, moisture, and sunlight are just as important.
Fertilizer for Tomatoes and Peppers
Tomatoes and peppers are hungry plants, but they are also easy to overfeed. They benefit from fertile soil and regular moisture, especially once they begin flowering and setting fruit. The mistake is giving them too much nitrogen all season, which can produce huge plants with lots of leaves but fewer tomatoes or peppers.
At planting time, use compost and a moderate, balanced fertilizer or starter fertilizer according to the product label. Once the plants are established and actively growing, a light side-dressing beside the row can help support continued growth. When fruit begins forming, many gardeners switch to a tomato or vegetable fertilizer that is not overly high in nitrogen.
Do not bury granular fertilizer against the stem. Spread it in a small ring several inches away from the plant, lightly work it into the surface if the roots will not be disturbed, and water it in. Keep mulch pulled back slightly from the stem so the base of the plant is not constantly wet.
Fertilizer for Cucumbers, Pumpkins, Squash, and Watermelons
Cucumbers, pumpkins, squash, and watermelons are vigorous plants with long vines, large leaves, and a strong appetite once the weather warms up. They often do well in compost-rich soil with a balanced fertilizer applied at planting and a follow-up feeding after they begin putting on serious growth. If they are growing in poor soil, they can run out of nutrients quickly.
The trick is not to keep pushing nitrogen endlessly. A cucumber or pumpkin plant that is all vine and no flowers may be getting too much nitrogen, too much shade, or inconsistent water. When the plants begin flowering and setting fruit, steady moisture and balanced nutrition matter more than dumping on stronger fertilizer.
For these warm-season crops, mulch can be extremely helpful once the soil has warmed up. Straw, shredded leaves, untreated grass clippings applied thinly, or other clean organic mulch can reduce weeds, hold moisture, and keep fruit cleaner off the soil. Do not bury small seedlings under heavy mulch, and keep the material a little away from the stem.
Fertilizer for Carrots, Radishes, and Beets
Root vegetables are where people often make the mistake of feeding too heavily. Carrots, radishes, and beets need loose soil, even moisture, and room to develop roots. They do not usually need repeated heavy nitrogen applications once they are growing.
Too much nitrogen can cause carrots and beets to put more energy into lush leafy tops instead of solid roots. Fresh manure is also a poor choice right before planting carrots and radishes because it can lead to rough, forked, or misshapen roots. Compost that has fully broken down is a much better option.
Use modest amounts of compost before planting and avoid repeatedly side-dressing root crops with high-nitrogen fertilizer. Beets can be sensitive to micronutrient deficiencies in some soils, but do not start adding random products such as borax, Epsom salts, or mystery garden amendments without a soil test. A simple balanced vegetable fertilizer with micronutrients is usually a safer approach when the soil genuinely needs feeding.
A Simple Feeding Plan for a Mixed Vegetable Garden
A mixed garden does not need separate fertilizer formulas for every single row. A practical system is far easier to follow and much more likely to be used consistently. Start with a good compost layer, use one balanced garden fertilizer where needed, then give extra attention only to the plants that are clearly heavy feeders.
A simple approach looks like this:
- Before planting, spread finished compost over the bed and work it into the top layer of soil where practical.
- Use a balanced granular fertilizer according to the package rate for vegetable gardens.
- Keep granular fertilizer away from direct contact with seeds, roots, and stems.
- Water after applying fertilizer unless the label specifically says otherwise.
- Side-dress tomatoes, peppers, cucumbers, pumpkins, squash, and melons after they are established and growing strongly.
- Feed carrots, radishes, and beets lightly, if at all, after planting.
- Add mulch after the soil has warmed and plants are established.
- Pause feeding if plants are stressed from drought, transplant shock, cold weather, disease, or waterlogged soil.
The best gardeners do not fertilize on autopilot. They look at the plant first. Pale older leaves, slow growth, poor soil, and weak colour can point toward a nutrient issue. But curling leaves, spots, wilting, blossom-end rot, stunted growth, or poor fruiting can also be caused by temperature, poor pollination, disease, poor drainage, compacted soil, pests, or inconsistent watering.
How to Fertilize Hedges for Faster, Healthier Growth
Hedges need a different approach from vegetables. A hedge is a long-term woody planting, not a fast-growing annual crop that is supposed to produce fruit in one season. A healthy established hedge may not need much fertilizer at all, especially if it has good soil, decent moisture, and a layer of mulch.
Young or newly planted hedges can benefit from gentle spring feeding if the soil is poor or the plants are pale and slow-growing. A slow-release evergreen, tree-and-shrub, or balanced fertilizer is generally a safer choice than a high-nitrogen lawn fertilizer. Follow the label rate for shrubs, spread it across the root zone rather than in a pile at the base, and water it in well.
Cleaning up around the hedge before fertilizing is a smart move. Grass and weeds compete with hedge roots for water and nutrients, so trimming or pulling them back helps the hedge use what you apply. Be careful with a string trimmer, though: repeatedly nicking the bark on young hedge stems can seriously damage or even kill them.
After clearing weeds, add a two- to three-inch layer of wood chips, shredded bark, or other suitable mulch around the hedge. Keep the mulch several inches away from the stems or trunks instead of piling it directly against them. That creates a clean weed-free zone, holds moisture, protects roots, and makes fertilizer more effective because the hedge is not competing with grass.
Avoid heavy nitrogen feeding late in summer. Late-season fertilizer can push soft new growth that may not harden off before winter. For hedges, early spring is generally the safer time to feed if feeding is needed at all.
Common Fertilizer Mistakes to Avoid
Most garden-fertilizer problems come from doing too much, not too little. Plants can survive a modest nutrient shortage much more easily than burned roots or salt buildup from repeated overfeeding.
Avoid these common mistakes:
- Adding fertilizer every time you water.
- Applying dry fertilizer to bone-dry soil and not watering afterward.
- Placing concentrated pellets directly against transplant roots.
- Using high-nitrogen lawn fertilizer around fruiting vegetables.
- Feeding tomatoes and peppers heavily with nitrogen after flowering begins.
- Using fresh manure right before planting carrots, radishes, or beets.
- Applying fertilizer late in the season to push hedge growth before winter.
- Assuming every yellow leaf means the plant needs more fertilizer.
- Using “weed and feed” products anywhere near a vegetable garden.
When a Soil Test Is Worth It
A soil test is one of the best upgrades a serious home gardener can make. It takes the guesswork out of fertilizer shopping by showing the pH and nutrient levels already in the soil. That matters because adding more phosphorus, potassium, lime, or fertilizer to soil that already has plenty can waste money and create long-term imbalance.
A soil test is especially worthwhile when a garden has been used for several years, plants keep struggling despite regular care, compost and fertilizer have been added repeatedly, or you want to grow a large productive garden without guessing. In Ontario, accredited soil-testing laboratories can test pH and several key nutrients, giving you a much clearer idea of what the garden actually needs.
Final Thoughts
The best fertilizer program is not the most complicated one. It is the one you understand, apply carefully, and adjust based on what your garden is doing. Compost builds better soil over time, balanced fertilizer helps cover basic needs, mulch protects moisture and reduces weed competition, and careful observation tells you when a plant really needs more help.
For most mixed vegetable gardens, start with compost and a modest balanced fertilizer. Give tomatoes, peppers, cucumbers, pumpkins, squash, and melons a little extra support once they are actively growing, but do not turn every plant into a nitrogen experiment. Keep root crops lightly fed, protect hedges with mulch and weed control, and remember that fertilizer works best when the plants also have warmth, water, sunlight, and healthy soil.
Related External Links
- University of Minnesota Extension: Quick Guide to Fertilizing Plants — A clear overview of nitrogen, phosphorus, potassium, transplant fertilizer, and smart fertilizer timing.
- Ontario: Soil Sampling and Analysis for Managing Crop Nutrients — Explains why soil testing matters and how nutrient recommendations are based on actual soil conditions.
this was super helpful. I’ve yet to come across special fertilizer for hedges but I will be searching. I need to at least give my hedges a boost this summer even though they are best fertilized in the spring. I need the privacy!
There is a water soluble miracle grow product that says it is good for all kind of plants including shrubs and hedges. Works pretty well, I’d say!