
October Garden Harvest: What to Pick, Cook and Save
On October 5, 2026, I walked through my Ottawa-area garden with a camera and a question that probably deserves more attention in gardening guides: what am I actually going to do with everything I grew? There were roughly twenty sunflowers, curly kale, ruby chard, flowering basil, lettuce seed heads, and okra with surprisingly beautiful flowers. Some plants looked fresh, others looked tired, and several had reached stages I barely recognized. I had succeeded in growing a wider variety of plants than I normally eat, but growing them was only half the project.
That is where an October garden becomes interesting. A drooping sunflower is not necessarily ready to harvest, a green chard leaf is not necessarily unripe, and a handful of crumbling lettuce heads can conceal both useful seeds and considerable frustration. The challenge is deciding what belongs in tonight’s dinner, what needs more time, and what should become next year’s planting material. These photographs capture three parts of that puzzle: a developing sunflower head, colourful chard, and an okra plant producing flowers and pods.
October: Follow the Plants, Not Just the Zone Number
I initially thought of this garden as roughly Zone 4 territory, but a remembered zone number is not a precise guide to autumn harvesting. Canada’s hardiness maps were updated in 2025, and the Canadian system considers several climate factors rather than simply assigning every garden the same winter-temperature threshold. Natural Resources Canada’s updated hardiness-zone guidance explains why checking the current map for your location matters. For immediate harvesting decisions, however, the local forecast and the condition of each crop are more useful than the zone label alone. Natural Resources Canada
Different crops also need different treatment as the season closes. Basil is a tender annual, while established kale can remain useful much further into cold weather. That makes “pull everything before the first chilly night” an unnecessarily blunt strategy. Harvest tender herbs promptly when frost threatens, but assess hardy greens individually rather than clearing the entire garden at once. University of Minnesota Extension
Saving Lettuce Seeds Without Sorting Every Crumb
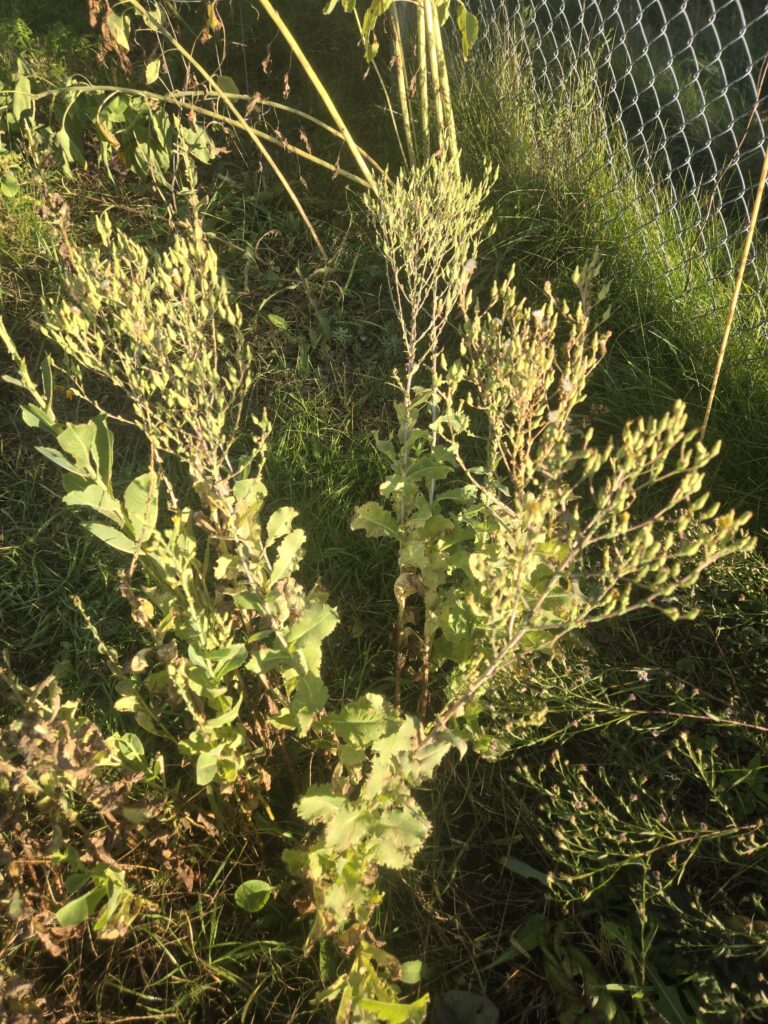
My lettuce seed-saving project quickly became a lesson in patience. I had collected the dried heads and put them in the sun, but opening them produced something that looked half seed and half miscellaneous plant material. Everything was small, brittle, and difficult to separate. The useful discovery is that seed cleaning does not require picking out every seed individually: screens separate by size, while gentle airflow separates lighter debris from heavier material. Seeds of Diversity
Are White Lettuce Seeds Different From Black Ones?
Mature lettuce seeds can be white or black, depending on the variety. White does not automatically mean immature, and black does not automatically mean better. Research has identified a genetic basis for this colour difference, so throwing away every pale seed could mean discarding perfectly useful planting material. A mixed collection may contain seeds from different varieties, but colour alone cannot tell you whether an individual seed will germinate. ResearchGate
Instead, look for recognizable, intact seeds rather than fluffy fibres, irregular flakes, or obviously unfilled material. A magnifying glass and a contrasting plate make this easier; compare several pieces rather than trying to judge one speck in isolation. Do not peel the dark covering off lettuce seeds, because the seed and its surrounding fruit wall are tightly joined and are planted together. The objective is to remove loose flower material, not dismantle the seed itself. SeedSavers
Start With Mature Heads, Not Merely Dry Ones
The structures commonly called lettuce “pods” are dried flower heads. A useful harvest signal is the appearance of the pale, fluffy tufts that help carry mature seeds away in the wind. Heads ripen gradually, so a branching stalk can carry ready seeds beside flowers or immature heads. Drying material in the sun does not, by itself, prove that the seeds had finished developing before collection. SeedSavers
For future collections, gently shake ready heads into a paper bag or collect individual fluffy heads before the wind empties them. This can bring in less debris than crushing entire stalks. For an already crumbled batch, there is no need to start over; work with a small amount at a time. Seeds of Diversity’s seed-cleaning guide explains the same combination of screening and airflow used below. SeedSavers
A Practical Three-Pass Cleaning Method
- Remove the bulky material. Spread a small handful over a tray and lift out obvious stems and large fragments. Rub unopened, mature heads gently enough to release their seeds without grinding everything into finer dust.
- Separate by size. Test a kitchen sieve or screen with a few recognizable seeds over a bowl. Ideally, one screen lets seeds through while holding large debris, and a finer screen retains seeds while letting dust fall through; a single strainer rarely removes everything.
- Finish with gentle airflow. Put a little material in a shallow bowl and use very light puffs of air, or a distant fan on its lowest setting, to move the fluff. Work over a large tray, because lettuce seeds are light enough to escape too, and inspect the discarded material before throwing it away. Seeds of Diversity
There is a sensible stopping point between clean seed and an evening spent chasing microscopic flakes. For personal planting, a little dry chaff is not a disaster. Large amounts are less desirable because plant debris takes up space and can absorb moisture during storage. Aim for mostly recognizable seeds with the bulky debris, dust, and insects removed—not laboratory perfection. Seeds of Diversity
Drying, Bagging and Checking Germination
Spread the cleaned seeds thinly in a protected, well-ventilated indoor location, away from strong heat and direct sunlight, until thoroughly dry. There is no universal “one afternoon” drying time because room humidity and the original moisture content vary. Use a folded piece of paper as a funnel to fill labelled envelopes, then place the envelopes inside an airtight container in a cool, dry location. Small zipper bags are also usable for completely dry seed, but sealing damp material is the mistake to avoid. SeedSavers
To compare the pale and dark seeds, try separate small germination tests rather than guessing. Place twenty seeds of each colour on damp—not dripping—paper towel in labelled, clear covered containers, keep them around 20°C with indirect light, and check over the following week or two. Sixteen normal seedlings from twenty seeds would represent 80% germination in that sample, not a guarantee for every packet. Fresh lettuce seed can sometimes be dormant, so an unexpectedly poor result deserves a repeat test rather than an immediate trip to the compost. University of Alaska Fairbanks
Sunflowers: Are Those Tiny Seeds Actually Ready?
My sunflower photographs show open blooms, fading petals, and a heavier head bending downward. Those differences do not establish that every flower is a different variety; age alone changes a sunflower’s appearance dramatically. Garden sunflowers are grown for several purposes, including cut flowers, oil, bird seed, and snacks. Without the original packets, I would not confidently label these plants “Mammoth,” “Russian,” or a particular oilseed variety. Yard and Garden
A sunflower’s centre is also not simply a tray of finished seeds. It contains many small flowers, and the little structures visible on a fresh bloom may still be florets rather than developed seeds. That helps explain why examining a flowering head can be disappointing when you are expecting supermarket-sized kernels. The edible petals around the outside and the seed-producing centre are different harvest opportunities. Plant Toolbox

How to Harvest Sunflower Seeds
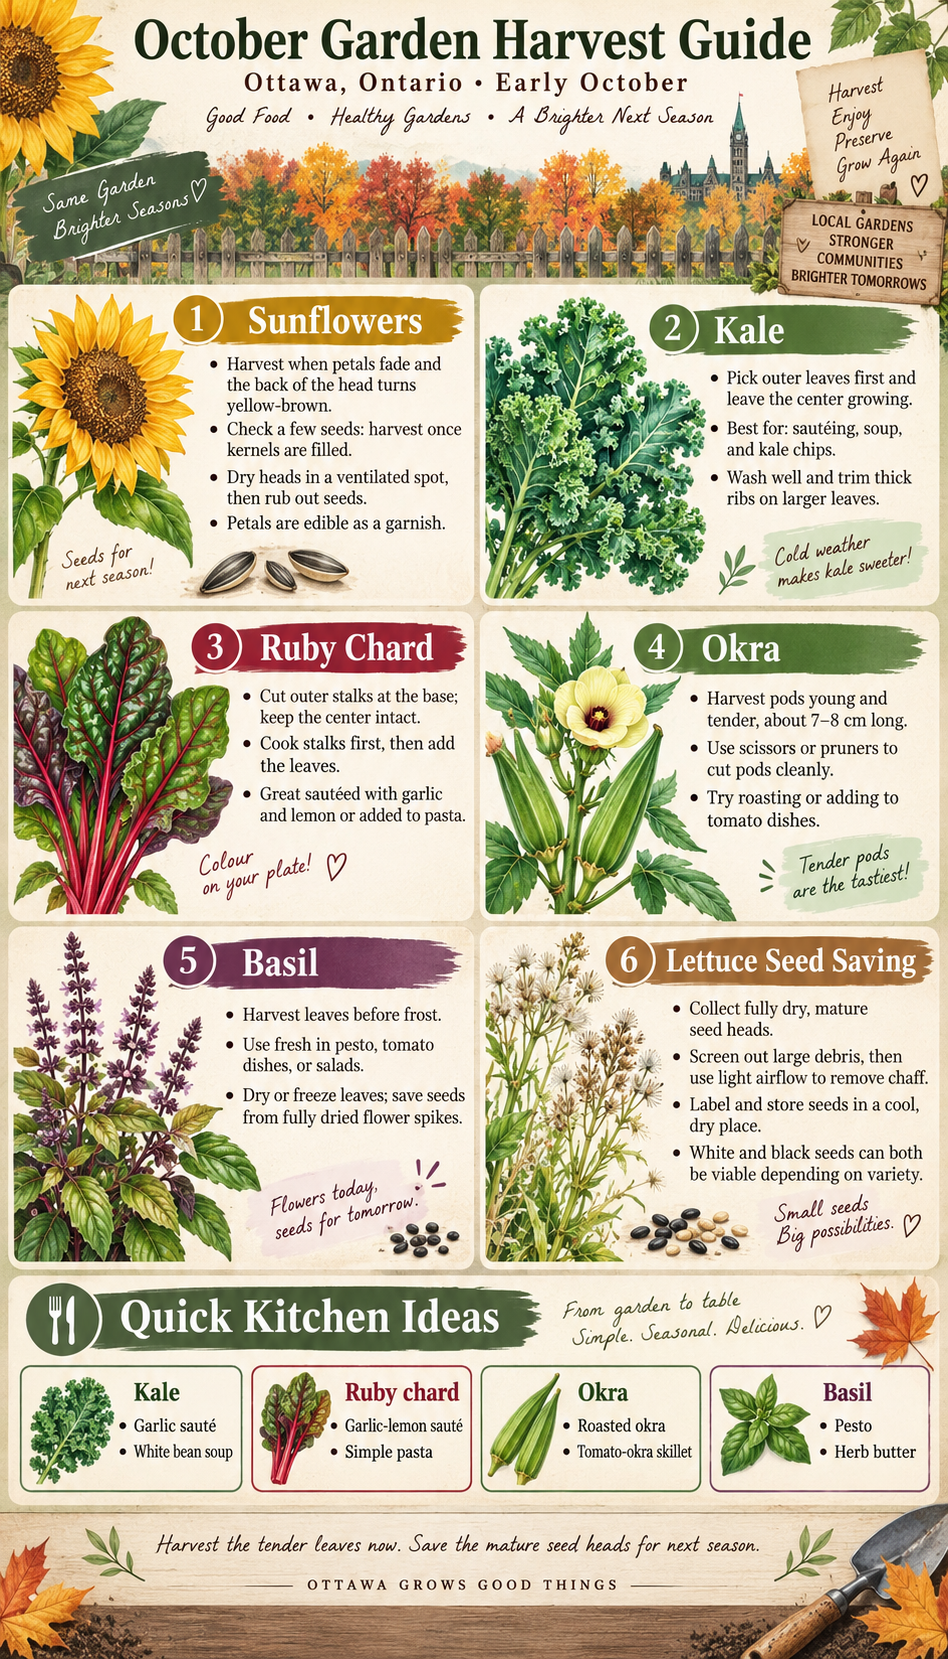
Check the back of the head as well as its face. A head approaching harvest generally has spent outer petals, a yellowing back, and dried flower remains that rub away easily. Open a few seeds from different places to check whether they contain filled kernels. A drooping head is a clue, not sufficient evidence on its own. Yard and Garden
Once mature, cut the head and hang it somewhere dry, dark, and well ventilated, using breathable material to catch falling seeds. Let it finish drying rather than enclosing a damp head in plastic. When the seeds release readily, rub them out over a tray and remove loose debris. Set aside the portion intended for planting before doing any roasting or seasoning. Yard and Garden
For eating, crack the shells and use the kernels rather than swallowing the hulls. A simple small-batch approach is to toast shelled kernels in a dry skillet over medium-low heat, stirring frequently until lightly golden, then immediately tip them onto a plate. Try them over soup, oatmeal, or salad. Seeds that are awkwardly small to shell may be more enjoyable left on sound, standing heads for birds, which are naturally attracted to sunflower seed. Plant Toolbox
Can You Use Sunflower Petals?
Yes—the petals of common sunflower, Helianthus annuus, are edible. Use fresh, sound petals from plants you have positively identified and grown for food, not flowers treated with products unsuitable for edible crops. Rinse gently and try a small scattering over a salad or rice dish. They are an optional garnish, not a reason to salvage deteriorating flowers. Plant Toolbox
Ruby Chard: Harvest the Leaves Before They Give Up
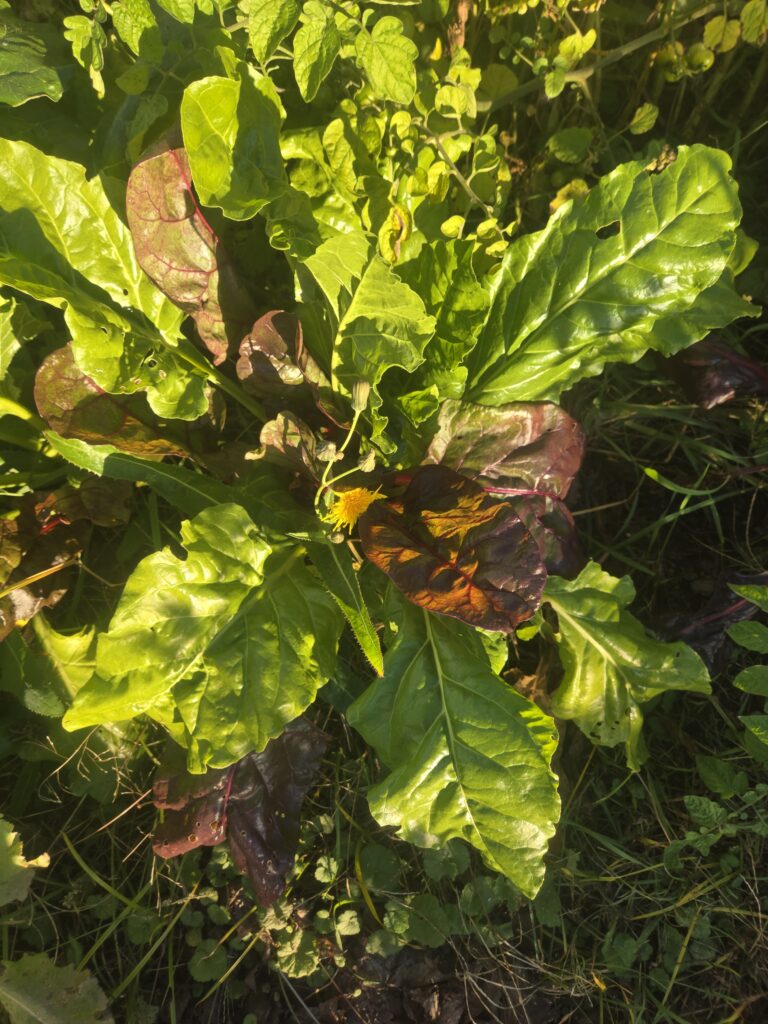
On this garden walk, I picked ruby chard leaves that were drooping or touching the ground. That prompted an important correction: chard does not need to reach that condition before harvesting. Pick individual leaves once they reach a useful size, preserving the central growing area and enough foliage for the plant to continue. Green leaves are not waiting to “ripen red”; chard varieties naturally have different leaf and stalk colours. University of Minnesota Extension
For repeated picking, use clean scissors to cut selected outer stalks near their base without slicing through the crown. Remove badly deteriorated leaves separately from the kitchen harvest, and avoid stripping the plant bare. Younger leaves can be used raw, while larger leaves are often more appealing cooked. Both the leafy portion and the colourful stalks are useful food. University of Minnesota Extension
What Do You Eat Swiss Chard With?
Cooking chard in a pan with oil, rather like spinach, is a good place to start. The main adjustment is to chop the stalks separately and give them a head start before adding the leaves. Serve the finished greens beside eggs, chicken, fish, potatoes, or rice, or fold them into a larger dish. These two versions keep the ingredient list short and give chard a clear role on the plate.
Recipe 1: Garlic-and-Lemon Ruby Chard
This is a straightforward side dish for two or three people. It works especially well alongside roasted potatoes and whatever protein you are already cooking. Keep the heat moderate so the garlic flavours the oil without burning.
- 300 g Swiss chard, stalks and leaves separated and chopped
- 1 tablespoon olive oil, 2 minced garlic cloves, and 2 tablespoons water
- 1–2 teaspoons lemon juice, plus salt and black pepper to taste
- Heat the oil in a large frying pan over medium heat. Add the chopped stalks and cook for about 4–5 minutes, adding a splash of the measured water as needed.
- Stir in the garlic for about 30 seconds, then add the leaves and remaining water. Cover briefly, then uncover and stir until the leaves wilt and the stalks are tender.
- Remove from the heat and add lemon juice, salt, and pepper. Taste before adding more lemon, then serve immediately.
Recipe 2: Simple Swiss Chard Pasta
This turns a garden harvest into dinner rather than another side dish to plan around. The quantities make two generous servings. Parmesan is optional, and a handful of cooked white beans can make the meal more substantial.
- 200 g dried pasta and 250 g Swiss chard, stalks and leaves chopped separately
- 1 tablespoon olive oil and 2 minced garlic cloves
- 2 tablespoons grated Parmesan, optional; lemon juice, salt, and pepper to taste
- Cook the pasta according to its package instructions, reserving ½ cup of cooking water before draining.
- Meanwhile, cook the chard stalks in the oil for 4–5 minutes. Add garlic, then the leaves and a splash of pasta water, and cook until tender.
- Toss in the pasta, adding reserved water a little at a time until everything combines. Finish with Parmesan if using, pepper, and a small squeeze of lemon.
Kale: Pick Individual Leaves, Not the Whole Plant
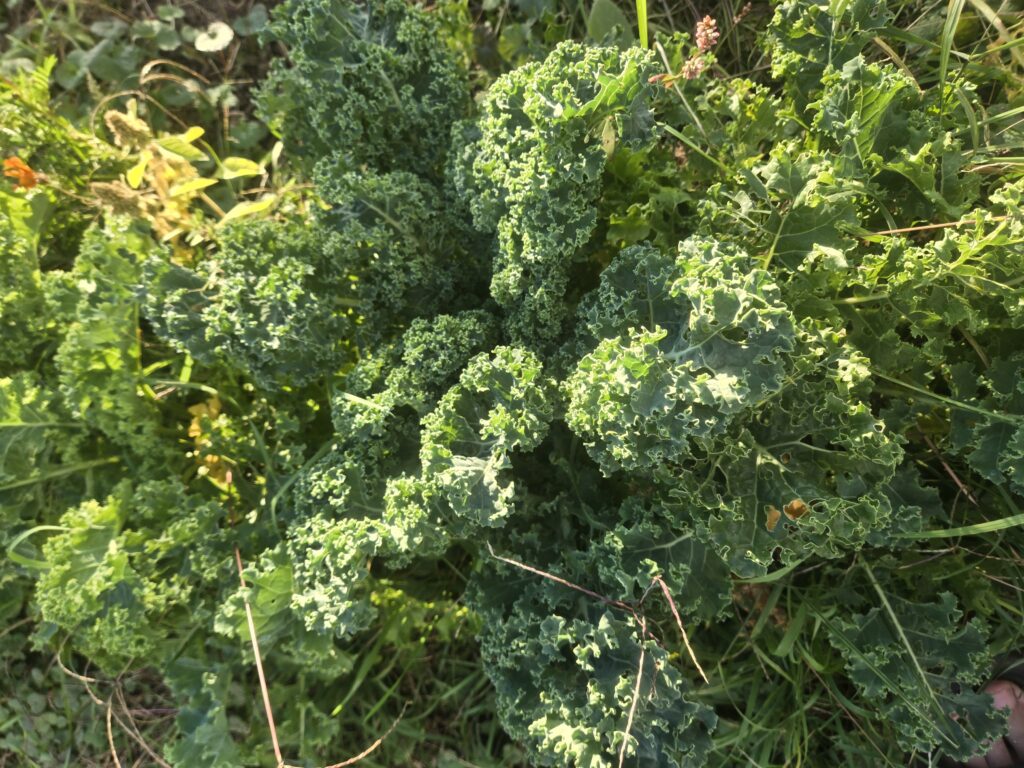
The curly kale in my garden already has substantial leaves; there is no need to wait for it to form a cabbage-like head. Harvest individual leaves when they reach a useful size, taking selected outer leaves while leaving the central growth and plenty of smaller foliage. Cooler autumn conditions can improve eating quality, but waiting indefinitely is not necessary. Kale can remain harvestable into cold weather even as growth slows. University of Minnesota Extension
Kale also benefits from preparation that suits its texture. For the recipes below, strip the leafy portions from the thick central ribs, then tear or chop them into manageable pieces. Inspect the folds carefully, especially where the photographs show chewing damage. A tray of crisp leaves and a pot of soup offer two quite different introductions to a vegetable that can seem uninviting when served as a mound of tough raw greens.
Recipe 1: Crispy Oven-Baked Kale Chips
Kale chips make a small harvest easy to experiment with. The important details are drying the washed leaves thoroughly, using only a light coating of oil, and avoiding a crowded baking tray. Treat the timing as a guide and remove pieces as they become crisp.
- 150 g washed kale leaves, thick ribs removed
- 2 teaspoons olive oil
- A small pinch of salt; garlic powder or smoked paprika, optional
- Heat the oven to 150°C/300°F. Dry the kale thoroughly and tear it into large bite-sized pieces.
- Massage in the oil lightly, then spread the leaves in a single layer across one or two baking trays. Add a little salt and any optional seasoning.
- Bake for roughly 15–25 minutes, checking from about 10 minutes onward. Turn the trays as needed and remove crisp pieces before they become deeply brown.
Recipe 2: Kale and White Bean Soup
Soup gives kale time to soften while placing it among familiar ingredients. This version makes approximately four modest servings and works with crusty bread. Adjust the broth at the end depending on whether you prefer a thick bowl or a lighter soup.
- 1 tablespoon olive oil, 1 diced onion, 1 diced carrot, and 2 minced garlic cloves
- 1 can white beans, about 540 mL, drained and rinsed; 1 can diced tomatoes, about 398 mL
- 750 mL vegetable or chicken broth, 150 g chopped kale without thick ribs, and salt and pepper
- Cook the onion and carrot in the oil over medium heat for about 5–7 minutes. Add the garlic and stir briefly.
- Add the beans, tomatoes, and broth, bring to a gentle boil, then simmer for 10 minutes.
- Stir in the kale and simmer for another 8–12 minutes, or until comfortably tender. Season to taste and add extra broth or water if needed.
Okra: The Vegetable With the Unexpected Flowers
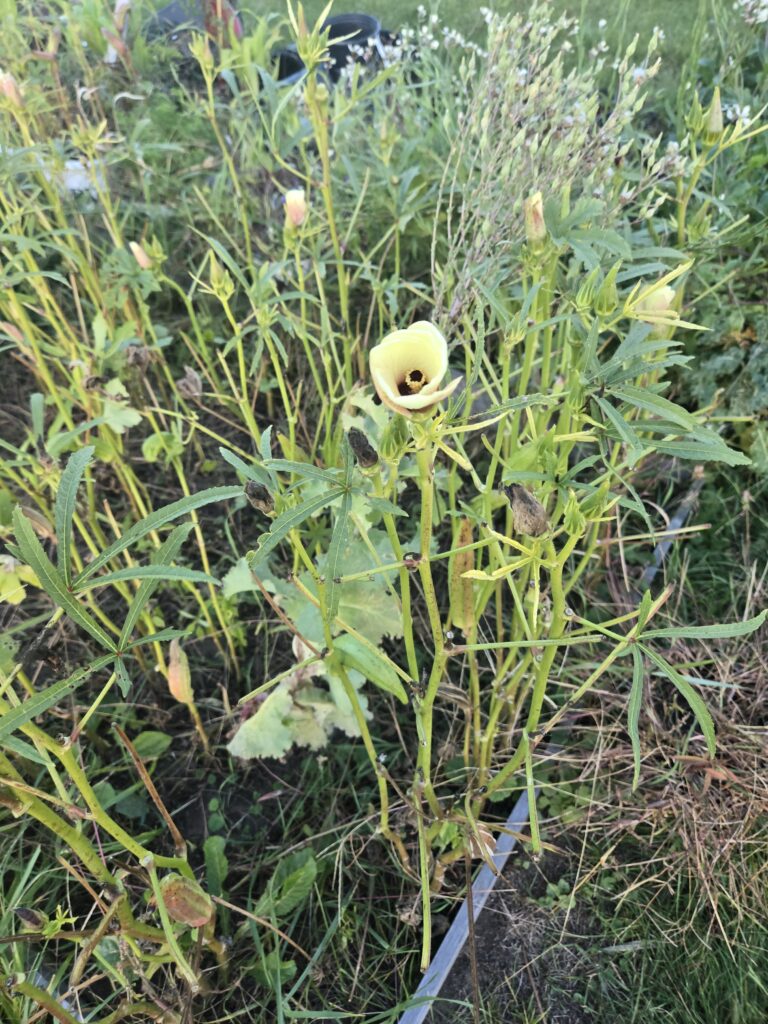
The plant with pointed green pods and pale yellow flowers is okra. Its dark-centred, hibiscus-like blooms make more sense once you know it belongs to the mallow family. Each flower is short-lived, but the plant can continue producing more. The flowers are edible too, although leaving them in place preserves the opportunity for pod development. Plant Toolbox
For eating, select young, tender pods rather than waiting for maximum size. Around 7–8 cm long is a useful starting point, but tenderness matters more than an exact measurement. Cut the short pod stalk with scissors or pruners instead of pulling against the plant, and wear gloves if its hairs irritate your skin. Okra is a warm-season crop, so those late flowers are not a promise of a substantial harvest before cold weather closes in. Plant Toolbox
For a simple introduction, halve washed, dried pods lengthwise and toss them with a little oil, salt, and smoked paprika. Roast in a single layer at 220°C/425°F for roughly 15–20 minutes, checking for tenderness and browned edges. Try them beside rice, chicken, or a bean dish. Seeds saved for planting require a different harvest: allow selected pods to mature and dry rather than collecting the tender pods used for dinner. Organic Seed Alliance
Flowering Basil: Leaves, Blossoms and Seeds Are Different Harvests
The purple-spiked herb in my photographs looks consistent with flowering basil, although the spikes do not identify its exact variety. Basil can have green or purple foliage and different flower colours. On positively identified culinary basil, the flowers are usable as well as the leaves; strip small blossoms from tough stems and try them over tomatoes or pasta. Do not assume an entire woody flower spike is the same thing as a spoonful of dried basil leaves. Plant Toolbox
For everyday cooking, collect sound leaves and use them in tomato sauce, pesto, sandwiches, or a tomato-and-cucumber salad. Flowering can change flavour and reduce leafy growth, but it does not automatically make the remaining leaves unusable. Taste a small piece from a confirmed culinary plant before committing a large amount to a dish. Since basil is tender, preserving useful leaves is generally more urgent than waiting for every late flower to finish. University of Minnesota Extension
To dry basil, rinse and pat the leaves dry, then spread them in a thin layer with good airflow. A dehydrator around 35–46°C/95–115°F provides controlled drying; follow the appliance’s herb instructions and continue until leaves crumble readily. Tender herbs can mould when dried too slowly in humid conditions, so avoid thick, damp bunches. Store thoroughly dried leaves in an airtight container away from light and heat. Food Preservation Canada
Freezing is another option and generally preserves a fresher basil flavour. Chop leaves into an ice-cube tray with a little water, freeze, then transfer the cubes to a freezer bag for sauces and soups. For seed saving, let selected flower spikes mature until their seed-bearing structures are dry and the seeds release, then clean and label them separately. A flowering spike, a jar of dried leaves, and a packet of planting seed are three different products—not interchangeable stages of one seasoning. University of Minnesota Extension
Parsley and the Mystery Leaves: Identify First, Cook Second
Not every plant in these photographs has a sufficiently certain identification. The glossy, serrated plant I initially thought might be parsley looks more celery-like, while another feathery patch looks carrot-like. The rounded, blue-green leaves and some white-flowering plants also need confirmation. Those are observations, not permission to eat them; I would check the original planting records and the whole plant rather than identify an unfamiliar crop by taste.
For positively identified parsley, tabbouleh is only one possibility. Try chopped parsley in potatoes, omelettes, bean salads, or butter for cooked vegetables. A quick gremolata-style topping combines ½ cup finely chopped parsley, the zest of one lemon, and one small minced garlic clove; sprinkle it over soup, roasted vegetables, or fish. That gives a familiar herb a useful job without requiring an elaborate recipe.
Keeping the Harvest Useful After Picking
Bring leafy vegetables inside promptly, rinse under cool running water, and check between folds and layers. Pat them dry and refrigerate loosely wrapped in a clean towel to manage excess moisture. Discard rotten or mouldy material rather than trying to rescue it through cooking. A harvest is only useful when it reaches the kitchen in a condition worth eating. Canada
For surplus kale or chard leaves, freezing is more practical than hoping a crowded refrigerator will preserve them indefinitely. Wash and remove tough stems, blanch the prepared leaves in boiling water for two minutes, then cool promptly in ice water. Drain well, portion into freezer containers or bags, label, and freeze. These portions are particularly convenient for cooked dishes such as soup, pasta, and eggs. Food Preservation Canada
The Real Value of an October Garden Harvest
I planted variety because I wanted to grow more than the same familiar vegetables. October revealed the next part of that experiment: learning which leaves to pick, which flowers to leave, and which dry-looking remnants contain another season. It also exposed the limits of guessing—about plant names, seed colour, maturity, and what belongs in a recipe. The most useful outcome is not a perfectly tidy garden or perfectly polished seed packets, but a few meals I know how to make and planting material I have handled carefully. That is how an unfamiliar harvest starts becoming part of everyday life.