
The trick is not looking for treasure — it is learning what looks out of place
A glittering roadside cut can stop you in your tracks. Sometimes it is a seam of mica flashing in the sun. Sometimes it is pyrite, the classic “fool’s gold.” Once in a while, it might be quartz crystals, garnet, agate, amethyst, or another mineral worth tucking into a field pouch and identifying properly at home.
The useful skill is not believing every shiny rock is valuable. It is learning how to read the ground well enough that you notice the odd rock before you walk past it. In Ontario and Quebec especially, where Canadian Shield bedrock, glacial deposits, old roadcuts, lakeshores, and mineralized zones all mix together, interesting stones can show up in places that do not look dramatic at first glance.
This guide is written for hikers, homesteaders, bushcraft readers, and curious beginners who want a practical eye for minerals and gems. It will not turn every walk into a payday, and it should not replace a local geology map or a proper mineral guide. But it will help you spot the kinds of signs that rockhounds pay attention to: veins, crystals, heavy gravels, rusty staining, pegmatite, unusual colors, and rocks that simply do not match the rest of the landscape.
Know the rules before you collect anything
Before the fun part, here is the plainspoken warning: collecting rocks is not automatically allowed just because a stone is sitting outdoors. Private roads, private lots, parks, conservation areas, mining claims, Indigenous lands, quarries, old mine sites, and protected natural areas can all have different rules. In many places, taking even a small souvenir may be restricted or prohibited.
For a casual hiker, the safest habit is to treat looking as the default and collecting as something you do only when you know it is allowed. If you are on private land, ask permission. If you are in a park, check the park rules. If an area has active claims, posted signs, old shafts, tailings, industrial ruins, or fenced-off cuts, do not assume it is open for casual rockhounding.
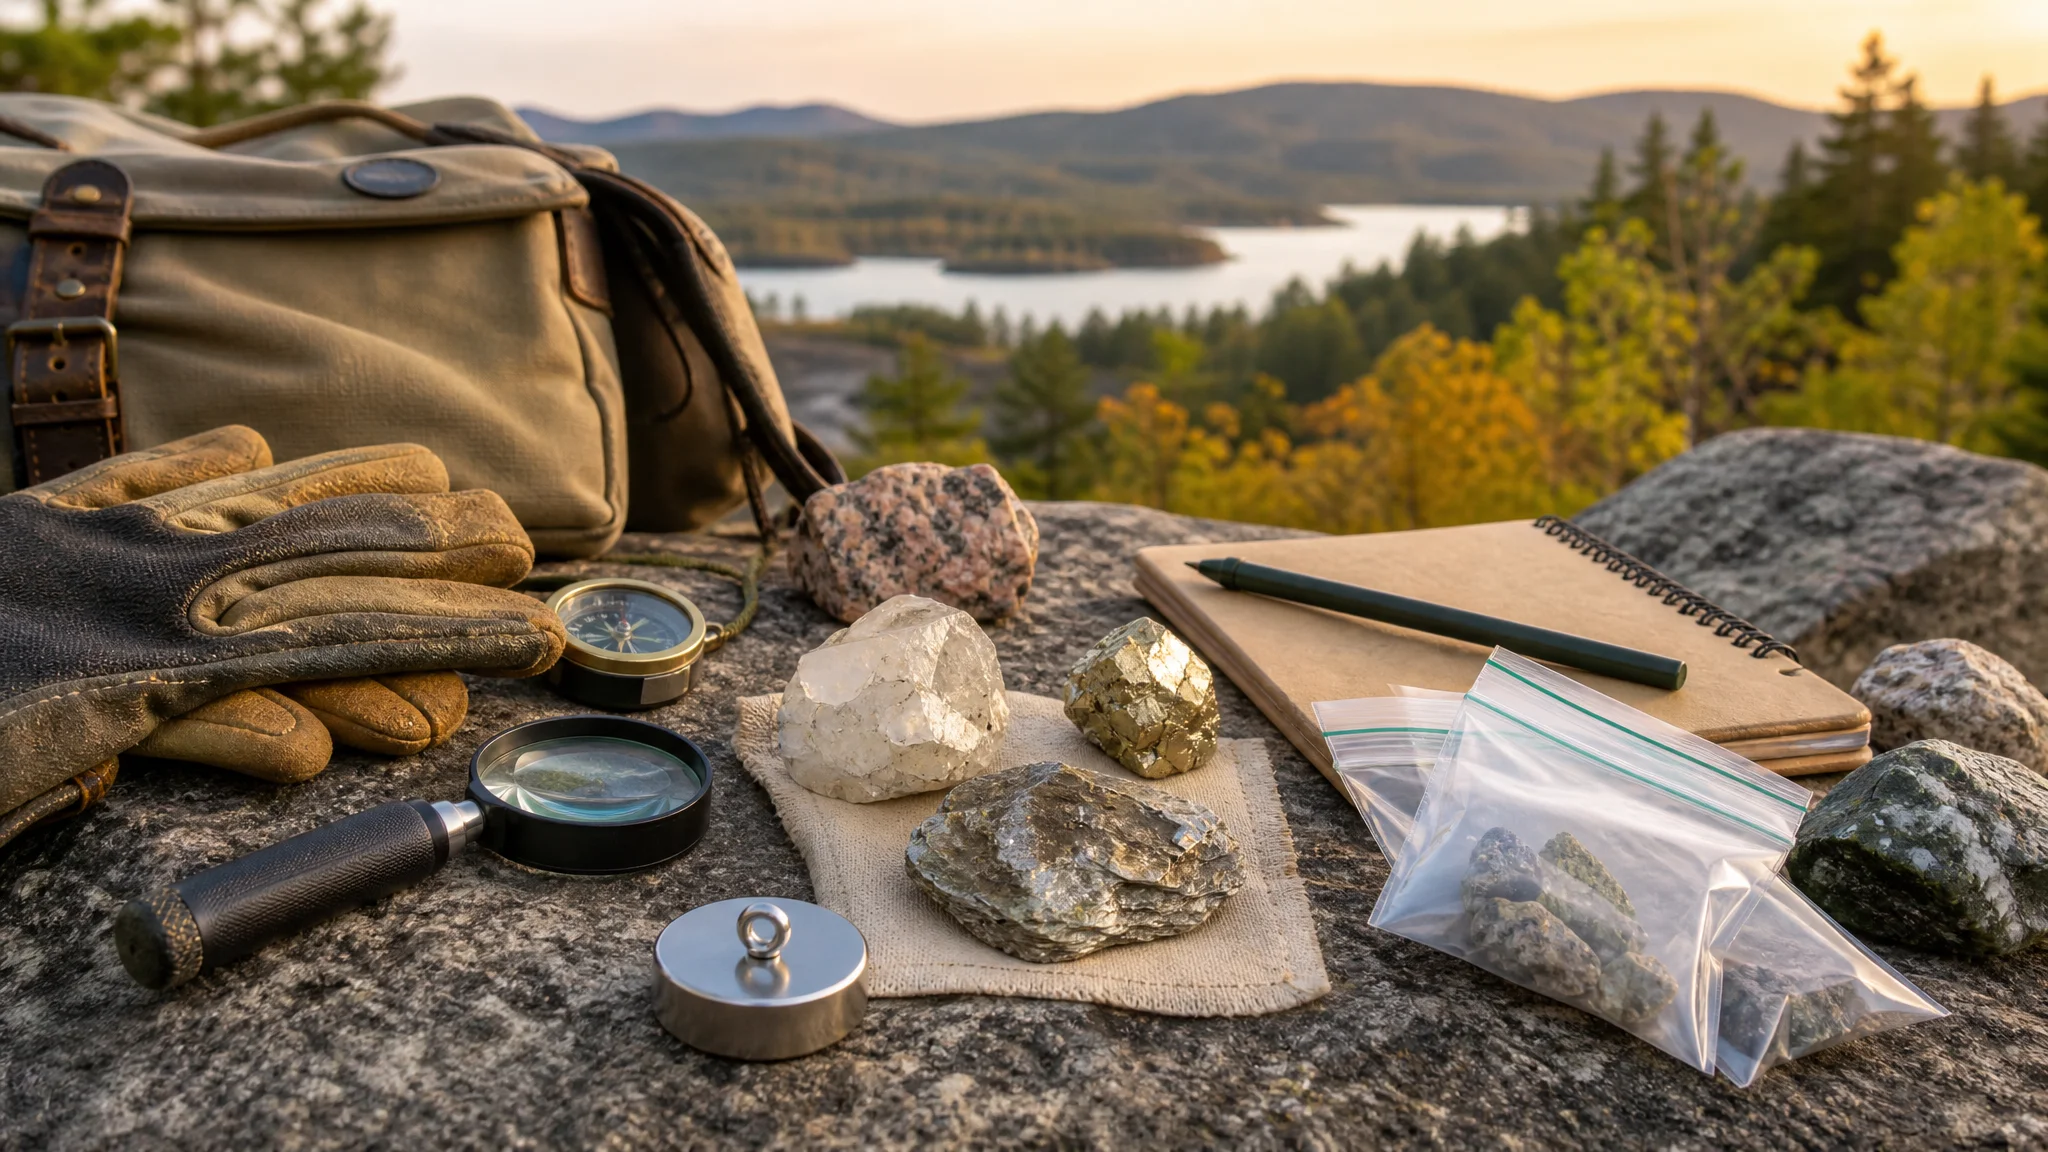
There are safety concerns too. Do not enter abandoned mines, adits, tunnels, shafts, or unstable pits. Do not hammer on roadcuts where falling rock, traffic, or property damage is a risk. Do not taste unknown minerals, breathe rock dust, or handle crumbly old tailings casually; some mineral areas can include undesirable metals or fibrous minerals. A pretty sample is not worth a bad decision.A beginner’s low-impact field kitHand lens: A 10x loupe helps you see crystal shapes, grains, and cleavage.Small magnet: Useful for magnetite and some iron-rich rocks.Notebook or phone notes: Record where the rock was found, what it was near, and whether it was loose float or attached bedrock.GPS or map app: Mark general locations only where sharing them would not encourage trespass or damage.Work gloves and eye protection: Especially if you are handling sharp broken stone.Small sample bags: Keep finds separate so softer minerals do not scratch each other.Field guide: A regional mineral or rock guide is more useful than a generic “gemstone” book.
The field signs that hint minerals may be nearby
Most valuable or interesting finds are not sitting in the open as polished gems. They are clues in the landscape: a different color in the bedrock, a vein crossing a cliff face, crystals in a coarse-grained rock, or rounded pebbles that stand out on a lakeshore. The more you practice noticing those clues, the less random rockhounding feels.
One helpful rule is to look for contrast. If the whole trail is gray granite and one boulder has white bands, rusty stains, or glassy pockets, pause. If a gravel bar is mostly dull tan stone but a few pebbles are waxy red, purple, green, or translucent, pick them up and look closer. If a roadcut has a coarse, pale band running through darker bedrock, that band might be a pegmatite or vein worth inspecting from a safe distance.Field signWhat it may suggestBeginner noteWhite, glassy veins cutting through rockQuartz veins, sometimes associated with crystals or metallic mineralsQuartz is common, but clear points, vugs, and mineral staining can make a sample interesting.Very coarse crystals in pale rockPegmatite, often containing quartz, feldspar, mica, and sometimes rarer mineralsPegmatites are one of the best beginner clues in Shield country.Gold, brassy, or silvery flashesMica, pyrite, chalcopyrite, or other reflective mineralsMica peels into flexible sheets; pyrite is harder and often cubic or brassy.Rusty orange or reddish stainingIron minerals weathering at the surfaceRust staining can be meaningful, but it is not proof of precious metals.Purple, red, green, or banded pebblesAmethyst, jasper, agate, epidote-rich rock, or other colored mineralsWet stones show color better, which is why lakeshores and creek beds are good practice areas.Dense black sand in stream bendsHeavy minerals such as magnetite, garnet, or sometimes gold-bearing concentratesHeavy mineral sand is a clue, not a guarantee.Angular loose rock below an outcrop“Float” that may have broken from nearby bedrockFollow float uphill or upslope only where it is safe and legal.
Why Ontario and Quebec are good places to train your eye
Ontario and Quebec are useful rockhounding classrooms because much of the region sits on old bedrock, especially across the Canadian Shield. This does not mean gems are everywhere. It means hikers often see exposed rock, roadcuts, lake-polished stones, glacially moved boulders, and mineral-bearing terrains that reward a slower look.
In northern Ontario and northern Quebec, the landscape can include granite, gneiss, greenstone belts, quartz veins, pegmatites, iron-rich rocks, and old mineral exploration areas. Around parts of Lake Superior, collectors are often interested in agates, jasper-like stones, amethyst-bearing areas, and colorful beach pebbles. In parts of southern Ontario and Quebec, limestone, dolostone, shale, and other sedimentary rocks become more common, so the “mineral hunting” changes character: you may notice calcite, fossils where collecting is allowed, fluorite in some regions, or crystals in cavities rather than classic hard-rock veins.
Glaciation adds one more wrinkle. A stone found on a trail or field may not have formed exactly where you found it. Ice moved boulders, cobbles, and gravel across long distances, which is why an interesting rock can appear far from its source bedrock. That makes casual finds exciting, but it also means you should be cautious about assuming “there must be a deposit right here” just because one loose stone looks unusual.Canada-wide patterns, in plain termsShield country: Watch for quartz veins, pegmatite, mica, feldspar, garnet, iron staining, and old hard-rock mineral zones.Lakeshores and rivers: Look for polished agates, jasper-like pebbles, quartz, garnet-rich sands, and dense black minerals.Mountain and metamorphic areas: Garnet, mica, quartz, and other metamorphic minerals can appear in schists and gneisses.Sedimentary areas: Think calcite crystals, fossils where permitted, geodes or cavities in some formations, and layered stone rather than gemmy veins.Old mining districts: Interesting minerals may occur, but legal access and safety concerns matter more than curiosity.
How to inspect a promising rock without fooling yourself
The easiest beginner mistake is to identify a rock by wishful thinking. A green mineral becomes “emerald,” a purple pebble becomes “amethyst,” and anything shiny becomes “gold.” A better approach is to slow down and collect observations before naming the specimen.
Start with context. Is the rock part of solid bedrock, or is it a loose piece sitting in soil or gravel? If it is attached to an outcrop, look at the surrounding rock: are there veins, bands, crystals, or weathered zones? If it is loose, look for other pieces nearby that match it. One odd stone may be glacial float; a whole trail of similar pieces may point toward a nearby source.
Next, look at the fresh surface if one already exists. Many minerals weather dull on the outside but show color, sparkle, or crystal texture inside. That does not mean you should smash every rock you see. If collecting and breaking are legal and safe, use eye protection and keep the sample small. Often, a natural chip, broken edge, or water-wet surface will tell you enough for a first look.A simple five-step field methodNotice the setting: Roadcut, creek gravel, lakeshore, exposed bedrock, old dump pile, trail surface, or field edge.Look for contrast: Color, sparkle, banding, veins, rusty zones, unusually heavy stones, or crystals.Check texture: Glassy, waxy, metallic, flaky, sugary, layered, fibrous, or granular.Test gently later: Hardness, streak, magnetism, and cleavage are better done calmly at home.Record the find: A photo of the stone in place plus a location note is often more valuable than memory.
Quick identification clues for common beginner finds
You do not need a laboratory to sort common rocks into “probably quartz,” “probably mica,” or “worth asking a local rock club about.” You do need to use more than color. Minerals can vary widely, and different minerals can look alike, especially when weathered.
Hardness is one of the most useful tests. Quartz is hard enough to scratch glass. Calcite is much softer and can be scratched with a steel nail. Mica splits into thin sheets. Pyrite is harder and brassy, while mica flashes brightly but looks platy and flexible. These simple differences help you avoid the classic beginner trap of calling every glittery speck gold.Possible findWhat to look forCommon beginner confusionQuartzGlassy look, white to clear, hard, often in veinsMilky quartz is common; clear points or crystal pockets are less common.AmethystPurple quartz, sometimes as crystals or broken crystal fragmentsPurple glass, fluorite, or stained quartz can fool beginners.AgateWaxy luster, banding, translucent edges, rounded pebblesJasper and chert may be similar but less translucent.JasperOpaque red, yellow, brown, green, or banded silica-rich stoneOften attractive but not necessarily rare.GarnetDark red to brown crystals, often in metamorphic rocks or heavy sandsSmall garnets may look like dark specks until viewed with a hand lens.MicaShiny flakes or sheets, splits easily, flashes silver or goldOften called fool’s gold casually, though pyrite is the classic fool’s gold.PyriteBrassy metallic mineral, sometimes cubic, harder than micaCan be mistaken for gold; real gold is softer, heavier, and does not break into cubes.FeldsparPink, white, gray, or salmon-colored blocky crystalsVery common in granite and pegmatite; still useful as a pegmatite clue.CalciteSofter, often white or clear, good cleavage, common in sedimentary settingsCan resemble quartz until scratched or inspected closely.
Where to look while hiking, paddling, or driving back roads
The best beginner locations are places where rock is already exposed naturally or legally accessible without digging, blasting, trespassing, or damaging the site. Lakeshores, stream gravels, public road shoulders where stopping is safe and allowed, exposed bedrock on permitted trails, and plowed field edges with permission can all teach you a lot.
Roadcuts are tempting because they reveal fresh bedrock, but they deserve extra caution. Traffic, falling rock, unstable slopes, and property rules matter. If you cannot stand well away from traffic, stay off the cut. If the slope is loose, wet, icy, or undercut, do not climb it. Looking from a safe distance is often enough to notice veins, bands, or mineralized zones.
Creeks and shorelines are especially good for training your eye because water cleans and polishes stone. After rain, colors show better. On a lakeshore, kneel down and compare wet pebbles: which ones are banded, translucent, unusually dense, or sharply different from the majority? In a stream bend, darker heavy sand may gather in low-energy spots, along with garnet, magnetite, and other dense minerals.Practical places to slow downFresh washouts: Rain can reveal stones that were hidden under soil or leaf litter.Gravel bars: Look at the heaviest, darkest, most colorful, and most translucent pebbles.Lake Superior-style cobble beaches: Wet, rounded stones can show agate-like banding, jasper colors, and quartz.Bedrock ridges: Watch for veins crossing the rock or coarse crystals in pale bands.Old farm fields with permission: Glacial stones brought up by frost or plowing can include unusual erratics.Trail surfaces after grading: Gravel roads can expose mica, quartz, feldspar, and other common minerals, though the material may have been hauled from elsewhere.
The “could this be a gem?” reality check
It is fun to imagine cracking open a plain rock and finding emeralds. In real life, gem-quality minerals are uncommon, and most attractive field finds are valuable as curiosities, teaching specimens, or souvenirs rather than money. That does not make them disappointing. A sharp quartz crystal, a piece of purple amethyst, a banded agate, or a garnet-bearing schist can be a genuinely satisfying find even if it is not museum-grade.
Emeralds specifically require the right chemistry and geological setting, so they should not be the first guess for every green crystal. Many green minerals are more common than emerald, including epidote, chlorite-rich rock, greenish feldspar, serpentine-like material in some terrains, or stained quartz. The same goes for “ruby,” “sapphire,” and “diamond.” Canada has important mineral localities, but a casual trail find should be approached with curiosity first and dollar signs last.
If a stone seems unusually clear, intensely colored, crystal-shaped, very heavy, or unlike anything you have seen locally, set it aside and identify it carefully. Take clear photos in natural light, photograph the location if appropriate, and compare it with regional guides. A local rock and mineral club, lapidary group, university outreach program, or reputable mineral dealer may be able to help with identification, especially if you provide context instead of just a close-up photo.
A beginner checklist for bringing finds home and learning from them
The best rockhounds build a habit of learning from ordinary finds. Label your samples. Keep notes. Compare similar-looking rocks side by side. Over time, mica stops looking like gold, quartz stops looking mysterious, and pegmatite starts jumping out at you from across a trail.
At home, clean rocks with water and a soft brush first. Avoid harsh chemicals unless you know exactly what the mineral is and what cleaning method is safe for it. Some minerals can be damaged by acids or soaking, and some rusty or metallic samples are better left alone. If you do any scratching or breaking, wear eye protection and avoid breathing dust.Keep, compare, or leave it?Keep it if it is legal to collect, small enough to carry, visually unusual, crystal-bearing, banded, or useful for learning.Compare it if you have several similar pieces and want to learn how color, hardness, texture, and weight differ.Leave it if it is in a protected area, attached to a fragile site, too large, unsafe to remove, or only interesting because you hope it is valuable.A good field collection does not need to be large. Ten well-labeled specimens from legal locations will teach you more than a bucket of mystery rocks with no notes. The real reward is developing an eye for the landscape, so a hike becomes richer even when you come home empty-handed.
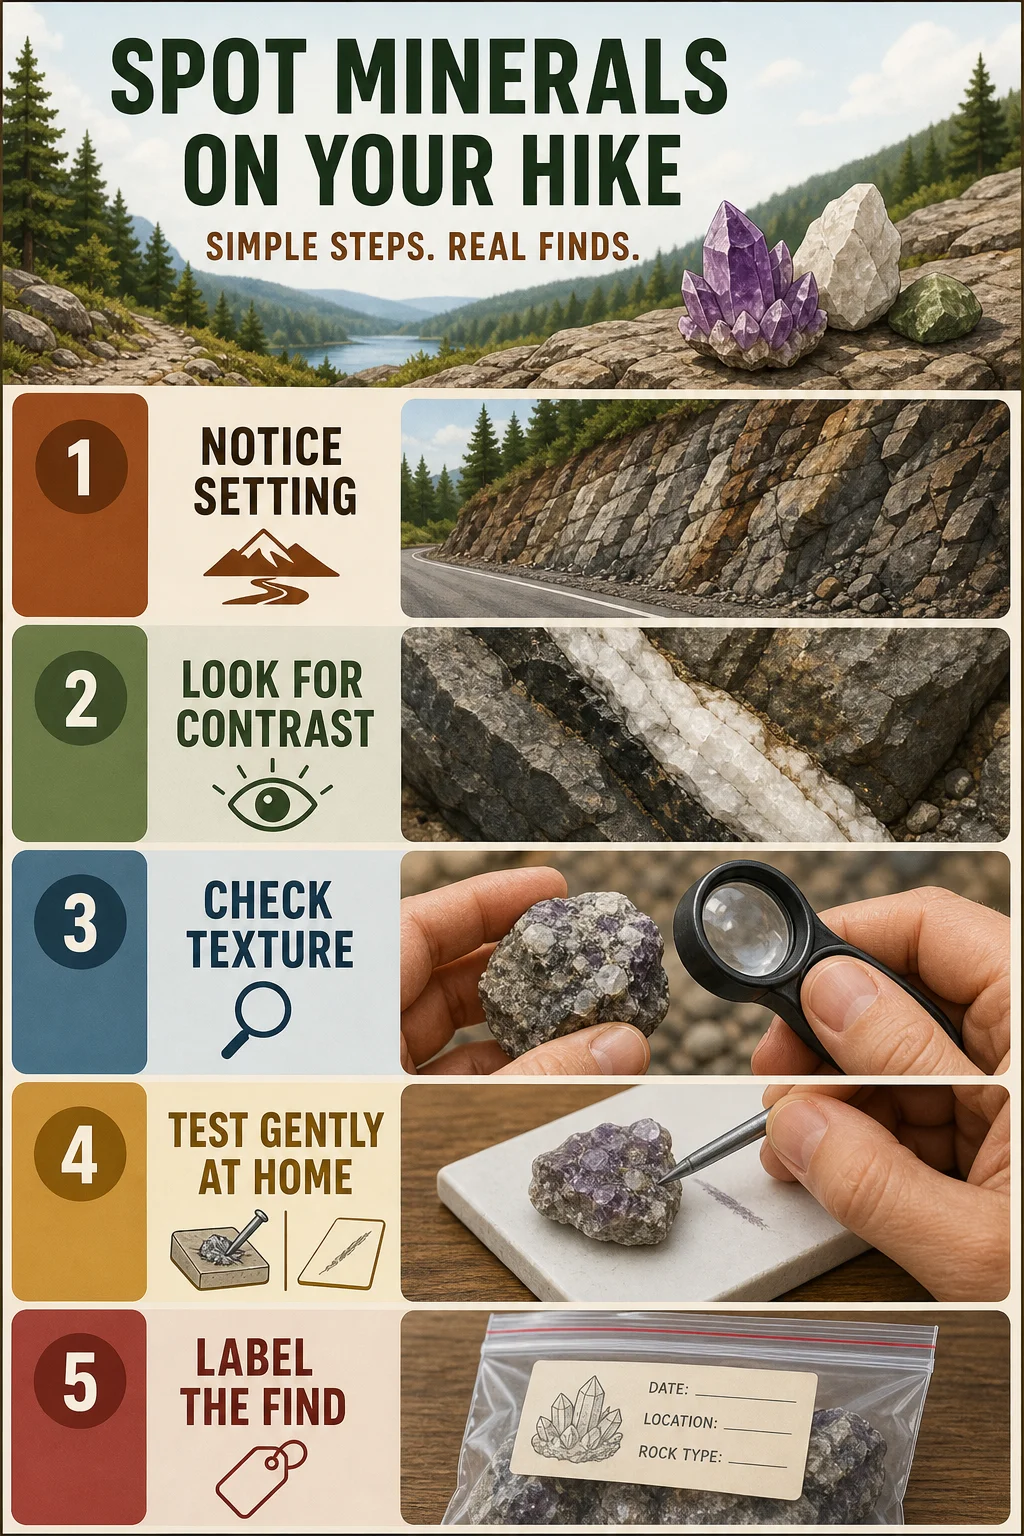
The useful takeaway: follow clues, not wishful thinking
If you are hiking in Ontario, Quebec, or similar Canadian terrain, pay attention to places where the ground changes character. Look for quartz veins, coarse pegmatite crystals, sparkly mica, brassy pyrite, rusty staining, colorful shore pebbles, heavy dark sands, and stones that contrast with everything around them. Those signs will not guarantee gems, but they will teach you where minerals tend to reveal themselves.
Stay legal, stay safe, and stay humble with identification. The rock you thought was treasure may be common mica, and the dull pebble you almost ignored may turn out to be a lovely agate once it is wet and cleaned. That is part of the charm. Mineral spotting is less about getting rich and more about becoming the kind of person who notices what the land is quietly showing you.
If you are building a broader outdoor skillset, pair this habit with plant identification, map reading, weather awareness, and low-impact hiking. The more clues you can read outdoors, the more alive a simple walk becomes.